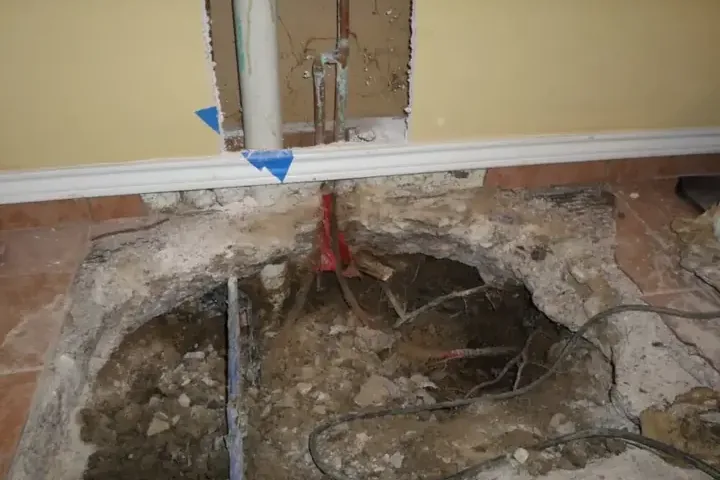
A damp floor over a slab in Johns Island needs an investigation that follows the water before concrete is cut or finishes are replaced. A supply release beneath the floor, water passing through an exterior opening and a leak from a nearby fixture require different repairs. The island setting includes the Stono River and tidal creeks, while each building has its own plumbing and floor assembly to inspect.
Key takeaways
- Record where dampness first appeared and whether the area continues to expand.
- Arrange plumbing diagnosis before selecting a concrete opening.
- Keep exterior rain observations separate from indoor supply observations.
- Map moisture in adjacent finishes as well as the slab surface.
- Ask for separate descriptions of source repair and water damage work.
Describe the floor symptoms precisely
A darkened grout joint, lifting floor edge or damp patch near a wall gives the inspector a location to investigate. The owner should record the material and the room, along with any change after discovery.
A description such as dampness spreading from beneath a cabinet is more useful than a guessed pipe location.
Furniture and stored items can hide the boundary. Moving them should wait where flooring is unstable or electrical components are wet, but accessible dry viewpoints can still provide useful photographs.
The team should know which areas could not be inspected and which floor coverings concealed the surface.
A slab leak water damage assessment connects these observations with plumbing findings and material readings. The purpose is to identify where escaped water traveled and what needs restoration.
It also gives the plumbing contractor a clearer record of the indoor symptoms prompting the investigation.
- Name the floor finish and the first affected room.
- Photograph lifting edges without pulling them apart.
- Note any active fixture leak visible above the floor.
Have the supply system evaluated
A plumbing professional can inspect the relevant supply system and choose diagnostic methods suited to the building. The restoration team should receive the resulting findings before treating the floor as an access point.
Repairing the source and removing water from surrounding materials are connected tasks with different responsibilities.
If an active supply release can be isolated safely, the shutoff action and its effect should be recorded. The team needs to know whether dampness stopped expanding or whether water continued to appear elsewhere.
Those details help connect the plumbing repair with the moisture condition in the room.
The burst pipe cleanup process addresses escaped supply water in affected building materials after isolation. A concealed leak may require a more selective opening than a visible pipe rupture.
The proposed access area should be explained before flooring or concrete is disturbed.
Compare the exterior entry observations
Coastal flooding and flash flooding are listed among Charleston regional hazards. On Johns Island, the owner should report any outside pooling or water seen crossing a building opening during the same event.
The inspection can then check the door sill, wall perimeter and indoor path alongside the plumbing investigation.
An exterior photograph should include the part of the building where water approached, taken from a safe dry position. Notes about rain belong with those images, while fixture observations belong with the plumbing record.
Keeping each observation attached to its location helps avoid mixing unrelated wet areas into a single repair explanation.
The floor inspection should also consider a nearby appliance or water heater if escaped water is visible around it. A puddle can travel beneath a finish before appearing at another joint.
Following that route helps the team decide whether concrete access is necessary or whether the source sits above the slab.
- Identify an observed threshold crossing or wall entry.
- Keep a separate photograph of any leaking appliance.
- Tell the inspector which surfaces became wet first.
Map the floor assembly before opening it
A slab surface, adhesive layer, underlayment and finished flooring may respond differently to water. The inspection should record the assembly actually present rather than treating the floor as a single material.
Accessible edges and selected openings can help show how far the moisture extends beneath a finish.
The room sketch should mark fixed cabinets, floor transitions and walls that interrupt access. Repeated measurements at identified points allow the team to compare later conditions with the initial inspection.
A dry reference should be suitable for the material being evaluated so that unlike surfaces are not treated as equivalent.
Where an opening is proposed, the owner should receive a description of its purpose and the materials affected. A plumbing access opening may serve a different purpose from lifting wet flooring for mitigation.
Clear labeling helps the repair contractor understand which work corrected the pipe and which work exposed trapped moisture.
- Mark concealed floor areas beneath permanent fixtures.
- Describe each retained layer in the inspection notes.
- Attach access photographs to the corresponding room sketch.
Plan extraction around the exposed layers
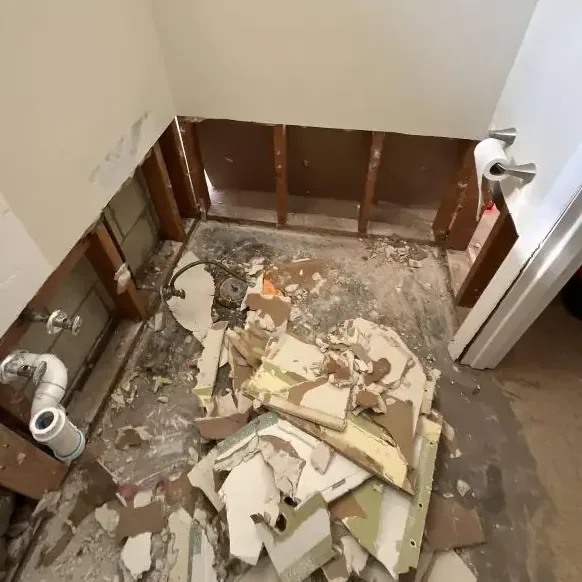
Accessible liquid should be removed using equipment appropriate for the surface and water condition. The water extraction scope may include adjoining floor edges where water traveled away from the original symptom.
Inspection findings should explain why those areas are included in the work.
Some finishes may be lifted to reach wet material underneath, while other sections can remain for continued evaluation. Decisions should address condition, cleanability and access.
Replacing a surface immediately after liquid removal can conceal moisture that still needs attention within the assembly.
The response team should keep the exposed repair area protected from normal household traffic. Tools, loose floor edges and removed materials can change how a room is used during work.
A temporary access plan helps occupants reach unaffected spaces without disturbing the inspection points or the plumbing repair.
Read the results after the source repair
Once the plumbing or exterior repair is complete, the material readings still need assessment. The team should connect the repair date with the moisture record and note any continued expansion of the wet area.
A recurring symptom calls for renewed inspection of the source and the affected floor layers.
Drying progress should be evaluated across the original boundary, including slow responding edges beneath trim or cabinets. Equipment changes should reflect those measurements.
The owner can help by reporting interruptions to power or access so that the record explains how the drying area was operated.
Floor replacement planning also needs the requirements of the chosen finish system. The repair contractor should assess the condition of the substrate before installing new material.
A mitigation completion record and a flooring installation decision serve related purposes and should both be retained with the job file.
Organize the handoff by repair responsibility
The final record should identify the diagnosed source, the work used to correct it and the materials handled during mitigation. Photographs of any pipe access belong beside images of the surrounding floor.
This arrangement lets a homeowner compare the repair invoice with the actual openings and retained surfaces.
Finish restoration should have a defined boundary. A proposal may need to address flooring transitions, cabinet access or wall trim beyond the plumbing opening itself.
Listing those items separately helps the owner understand why the cosmetic repair area can differ from the location of the original leak.
The closing conversation should also identify any observation that requires another visit, such as renewed dampness at the same joint. The owner can preserve a photograph and report the exact location.
That gives the responsible trade a clear starting point without requiring the homeowner to reopen the floor.
Questions
Does a wet slab always require breaking concrete?
Concrete access depends on the diagnosed source and the repair method. Water arriving from above or from an exterior opening can affect the same floor, so the plumbing findings should direct any proposed cutting.
Who should identify the pipe repair location?
The plumbing contractor determines the repair access after evaluating the supply system. The mitigation team contributes the moisture map and manages affected finishes around that work.
Why check the next room when its floor looks normal?
A connected floor assembly can carry moisture beneath an apparently unchanged surface. Comparing material readings across the transition helps define a sensible inspection and drying boundary.
What belongs in the flooring handoff?
The next contractor needs the exposed assembly photographs, retained material condition, drying documentation and the location of source repairs. Those details support planning for substrate preparation and replacement finishes.